About
About 

Walt Disney World Resort is opening back up. Are you planning on visiting the parks when they reopen? These park essentials are for you!
Posted in: Disney, Movies | Tagged: cookies, disney, Disney food, hidden mickey, HRL, mickey mouse, nerd food, Spring
Nerd Food at Home: Hidden Mickey Stained Glass Cookies
Spring is starting to peek its head out from winter's cold embrace, and I, for one, couldn't be any more excited! To celebrate, why not try your hand at these Hidden Mickey Stained Glass Cookies? They absolutely scream spring, and they'll delight any cookie fan.
Ingredients
- 1 package assorted hard candies
- 3 Cups flour
- 3/4 Tsp baking powder
- 1/4 Tsp salt
- 1 Cup butter, softened
- 1 Cup sugar
- 1 egg
- 1 Tbsp milk
- Powdered sugar, for rolling out dough
- Circular cookie cutter
- Small Mickey cookie cutter
- Silicone brush (optional)
Directions
-
Crush the candy until you have the consistency of sand. You can use a food processor, kitchen mallet, or something similar. Some larger pieces are fine. (Feel free to make this in advance.)

-
Mix together flour, baking powder, and salt. Set aside.
-
In a stand or electric mixer, beat together butter and sugar until smooth. Add egg and milk, and beat to combine. With mixer on low speed, slowly add flour, and beat until evenly blended.
-
Wrap the dough in plastic wrap and refrigerate for 2 hours.

-
Preheat oven to 350° F.
-
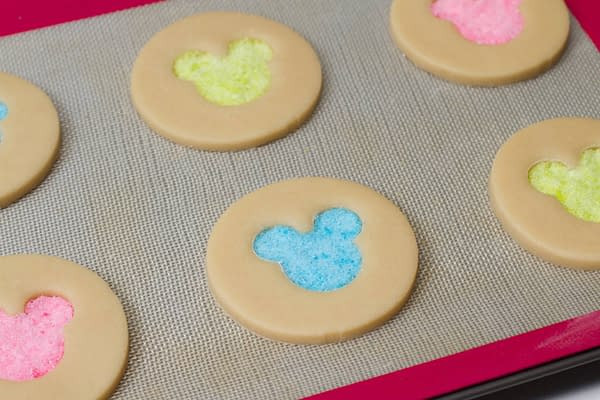
Sprinkle powdered sugar onto clean surface. Roll out dough to 1/4″ thick. Cut into circles. Using a smaller Mickey cookie cutter, cut out a center section of the cookies to make a "window." Place the cookies about 1″ apart on a silicon mat or parchment-lined baking sheet. Chill for 10-15 minutes if cookies have softened.
-
Carefully spoon some of the crushed candy onto the middle of each cookie. You can use a small silicone brush to remove any candy crumbs that spill over, onto the cookie dough.

-
Bake for 7-8 minutes, until cookies are just beginning to turn brown around the edges. Cool for a few minutes on the baking sheet until candy is set, then move to a cooling rack to finish cooling completely.

Enjoyed this? Please share on social media!
Stay up-to-date and support the site by following Bleeding Cool on Google News today!