Posted in: Amazon Studios, Anime, Cartoon Network, Crunchyroll, Disney XD, Hulu, Netflix, Nickelodeon, streaming, TV, YouTube | Tagged: anime, art, Arts and Crafts, bleeding cool, cable, Cardcaptor Sakura, CLAMP, DIY, Foam Boart, pin, Pin Board, streaming, television, tv
Anime Pin Lovers: An Easy DIY Guide to Making Your Own Pin Board
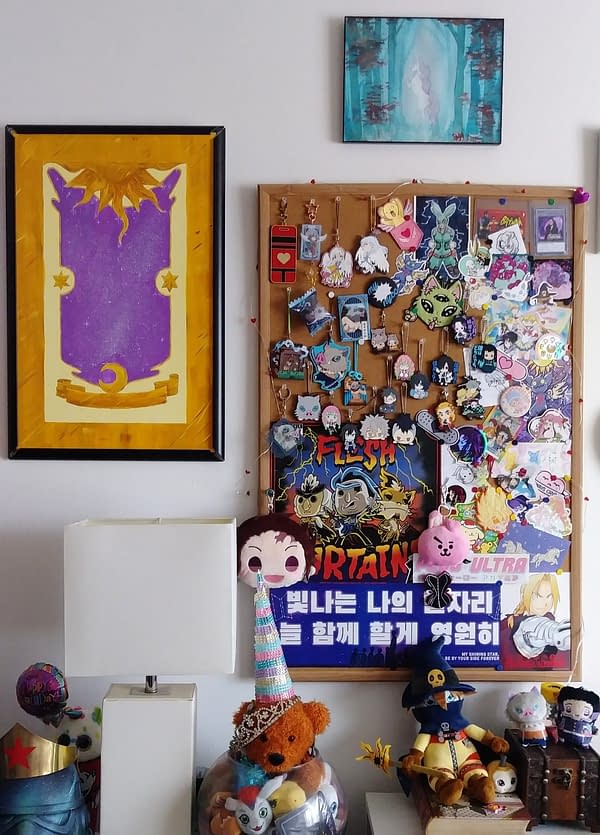
Pin collecting has been a little hobby for the past couple of years. I mean, it is a little portable piece of art that now most artists I love also offer. However, being in lockdown seems to have made my collection grow and now I am finding myself having to debate which pins have to be taken down so I can put others up. Most of my collection is anime I love, so the decision-making process is not so easy. Here is a little DIY board out of foam board that you can customize to fit any particular themes you like. In my case, my main collection is Cardcaptor Sakura… okay, maybe not my main, but the one I want to focus on the most for now, at least.

Anime Pin Board: Your Materials
Foam Board (went with one that has the three attached ones for science projects)
Pencil and Eraser
Ink/Pen (make sure it does not bleed out when you add color)
Paint (went with acrylic since oil tends to not dry fast or properly on certain surfaces)
Brushes
Mixing Container
Scissors or X-Acto Blades
Frame (optional: I bought a snap frame online)
Step 1: Draw out your design. If you can, try getting an extra piece of the material you will be using to try out your design and colors on a smaller scale to see what works or not. Since I am obsessed with Cardcaptors, my design was fairly easy: a Clow Card. I removed the extra folds from the board and now roughly measures 22" x 14". Do it on pencil first so you can erase the mistakes, try going lightly as the foam can cave in pretty easily.

Step 2: Ink it. I love Micron pens since they never bleed out when I add colors to my drawing. However, the surface of the board takes a little bit longer for the ink to dry. Keep that in mind and allow some time to add color.

*Insert little anxiety break to freak out over ruining it. It will be okay.
Step 3: Paint it! I took my time with it, to be honest. I probably should have done the inside first, but I had to mix paint multiple times to get the shade of purple I wanted. Take time to try different paints to get the shade you want. It took me several batches of wasted yellows and dull purples to get my end product. I did the gold parts of the inside details first and then moved on to the outside slowly. I added the purple inside right before I added the edges. After it dried I sprinkled white over the purple with a toothbrush to make the stars.


Step 4: Frame it. Unfortunately, my frame did not come with any mounting hardware as it promised and I could not find the correct handing v-hook to attach to it. The snap frame I got thankfully had little holes where I was able to thread some wire through and knot on the inside under the foam piece.

Step 5: Hang it and add your pins! And there you have it, your very own personalized Clow Card pin board- and the steps you can use to create an anime pin board for your favorite anime.


